How to integrate Arlo – HubSpot bundle using Zapier?
Make your business more productive with no extra effort: Learn how to connect Arlo and HubSpot with Zapier. Automate contact creation, saving you the time and hassle of order management.
Creating a contact in HubSpot when a new order is created in Arlo.
How the integration works: Every time you receive a new order in Arlo, Zapier automatically creates a new contact in HubSpot.
- Creating a Zap. While on the “Dashboard” tab, select the “Arlo” and “HubSpot” apps and click the “Make a Zap” button:

2. Select the trigger event. This event occurring in the triggering application signals Zapier to initiate the Zap. Choose “New Order” from the dropdown list and click “Continue”; the trigger will activate when a new order is created in “Arlo”.

3. Next, you need to specify the “Arlo” account and click the “Continue” button.

4. Next, you need to specify the settings for the trigger, with the ability to retrieve additional information about the order, and click the “Continue” button.


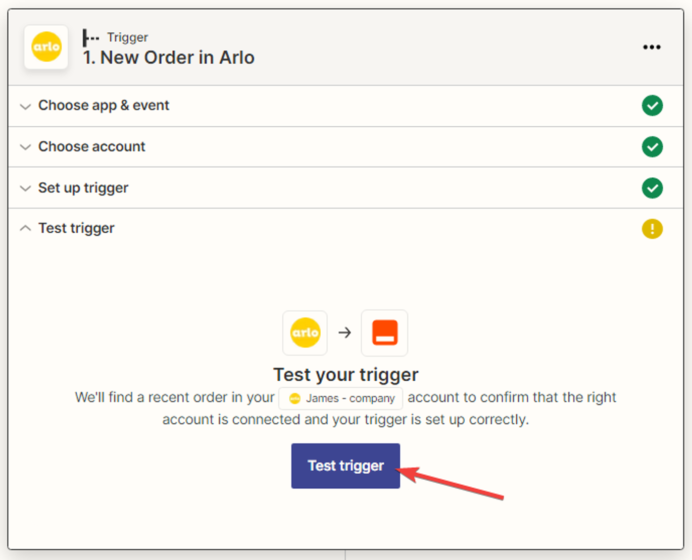
5. The next step is to test the created trigger by clicking the “Test trigger” button.
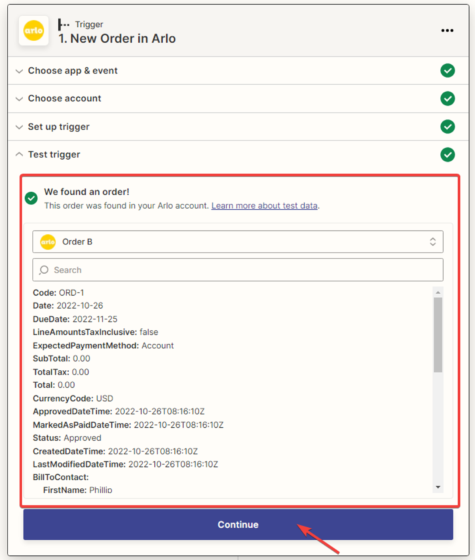
6. The next step is for Zapier to find the order and display all the information available in it. Click the “Continue” button.
7. Setting up data reception in the “HubSpot” service. In the next window, you need to specify the action that will be performed when a new order is created in the “Arlo” application. From the dropdown list, select “Create Contact” and click “Continue”.

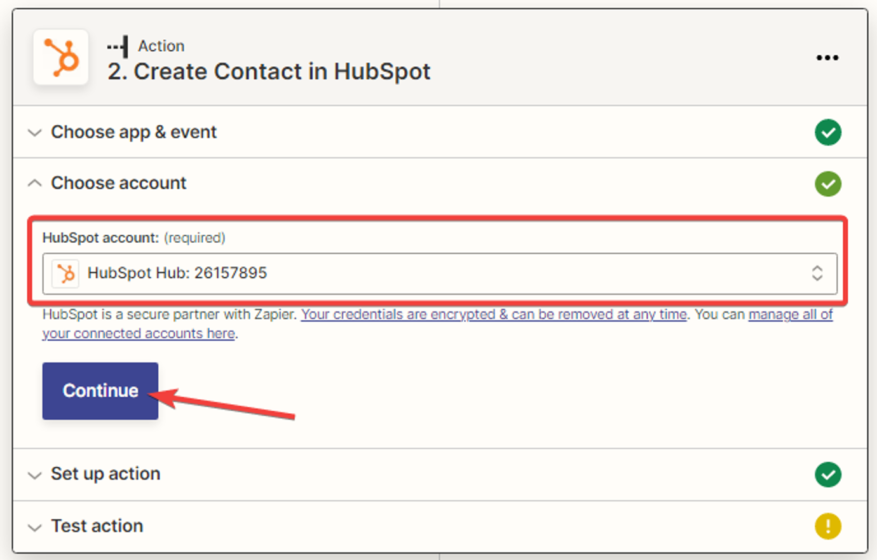
8. Next, select the “HubSpot” account and click the “Continue” button.
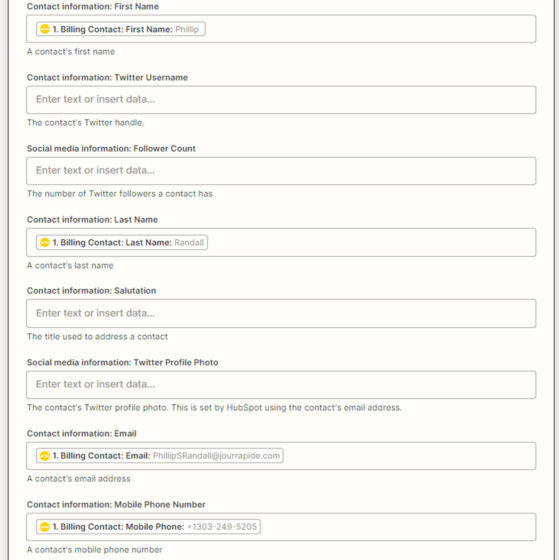
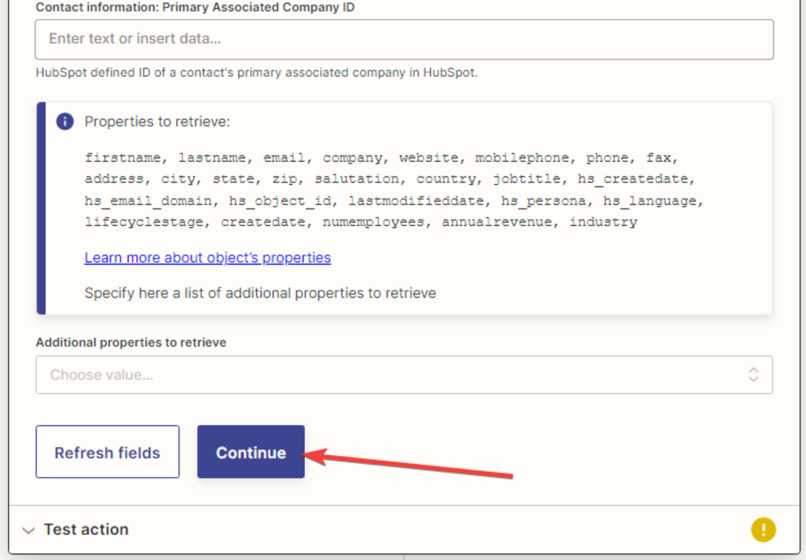
9. Next, you need to configure the action in “HubSpot” by filling in the fields. The data is selected from the dropdown list in the form of variables, then click the “Continue” button.

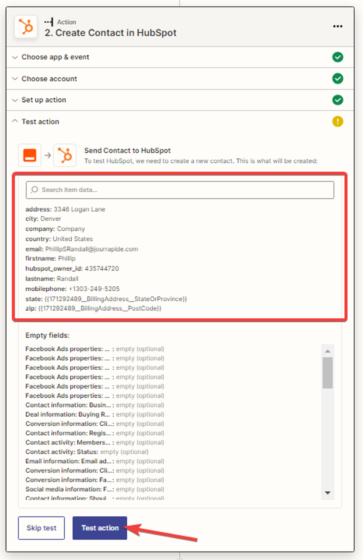
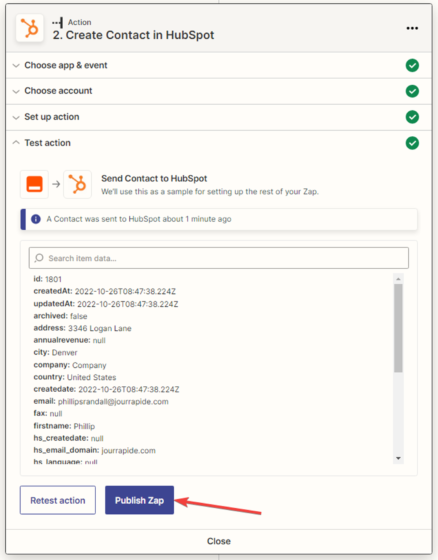
10. You need to test the connection between “Arlo” and “HubSpot”.
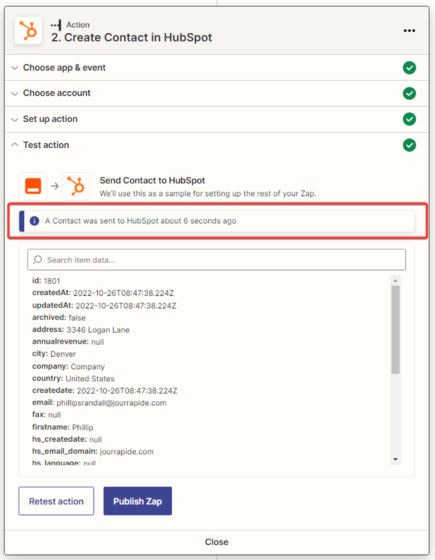
11. In the next window, you will receive a notification that the contact has been created in “HubSpot”.
12. Checking the test data:
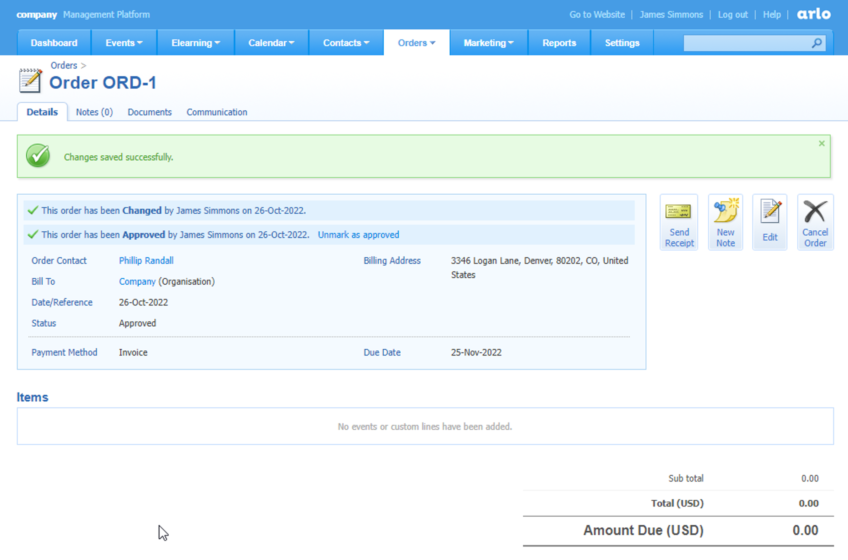
In Arlo
in HubSpot

The contact has been created in the list of contacts.
13. After a successful test, click the “Publish Zap” button.
The Zap is configured and activated.