How to integrate Asana – Trello bundle using Zapier? (option 2)
in
Integrations | June 24, 2024

Connect Asana and Trello using Zapier to simplify project coordination. This configuration creates Trello cards for every new Asana task, making it easier to track progress and work together.
Creating a Trello Card when a new task is created in Asana using Zapier.
How the integration works:
Zapier monitors your Asana account for new tasks with a tag of your choice. It then copies the information from these new tasks and creates a new card on your Trello board with that information.
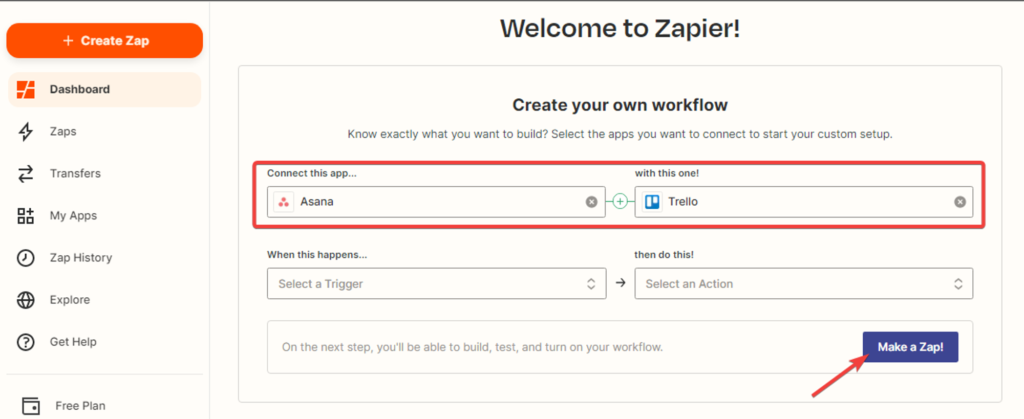
- Creating Zap: On the “Dashboard” tab, select the “Asana” and “Trello” applications and click on “Make a Zap”:
- Selecting the trigger event. This event, which occurs in the triggering application, signals Zapier to initiate the Zap. Choose “Tag Added to Task” from the drop-down list and click “Continue”. The trigger will activate when new tasks are created in Asana.

- Next, you need to specify the “Asana” account and click the “Continue” button.

- Next, you need to set up the trigger by selecting the workspace (organization) in “Asana,” specifying the task tag that will trigger the Zap, and clicking the “Continue” button.

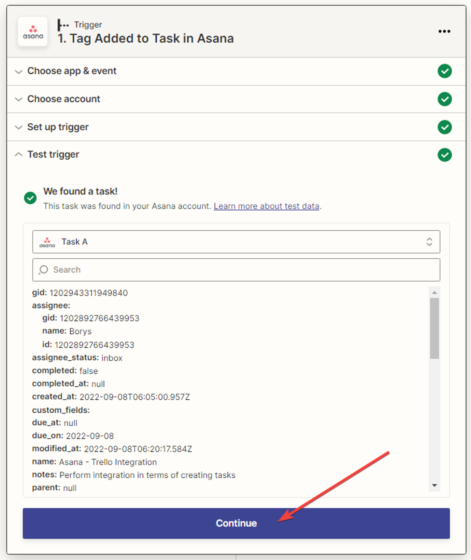
- The next step is to test the created trigger by clicking the “Test trigger” button.

- You will see a notification that the data has been found. Click the “Continue” button.
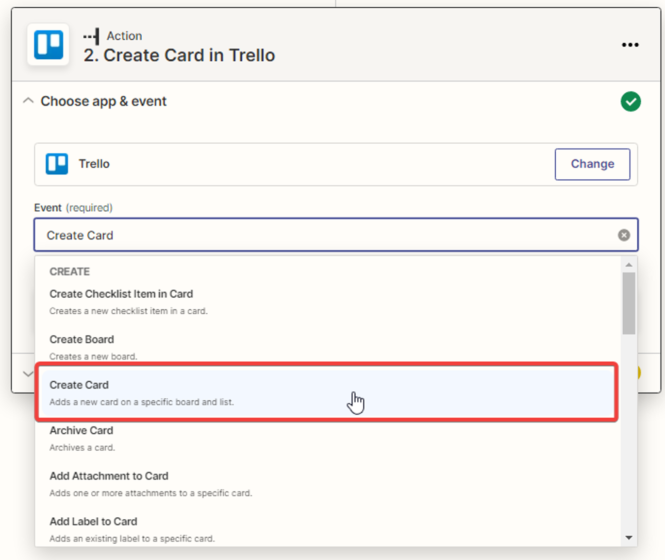
- Setting up data reception in the Trello service. In the next window, specify the action that will be performed when new projects are created in the Trello application. Choose “Create Card” from the drop-down list and click “Continue.”
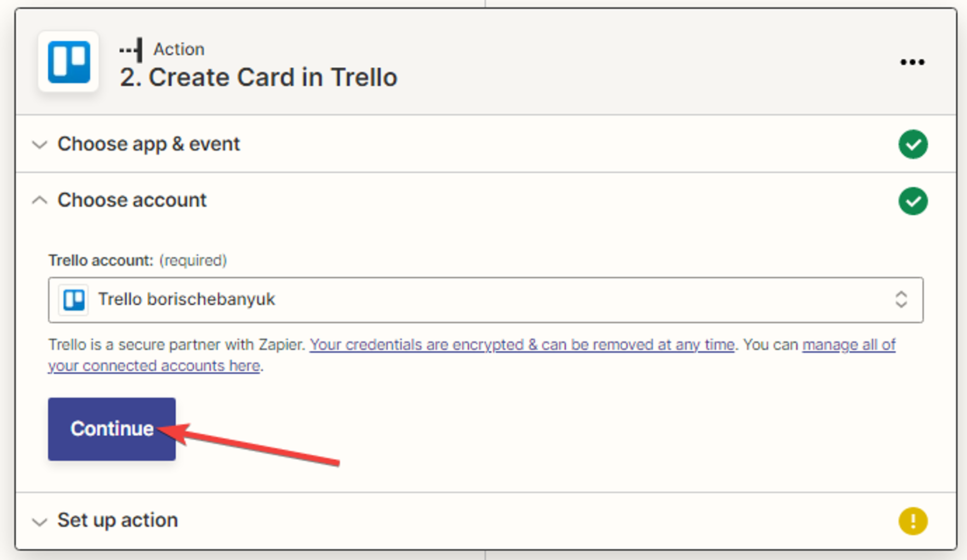
- Next, you need to select the “Trello” account and click “Continue.”
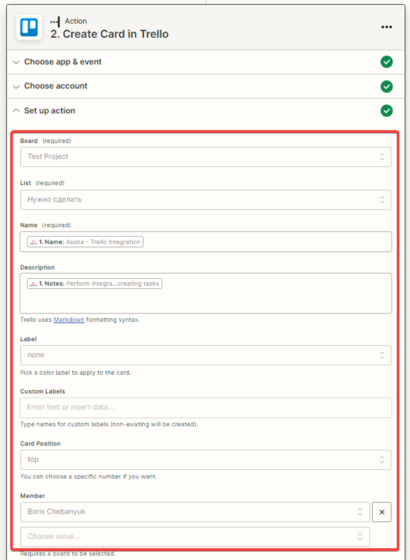
- Next, you need to configure the action in “Trello” by filling in the fields. The data is selected from the dropdown list as fixed data for a specific project, such as:
- Board;
- List;
- Label;
- Member;
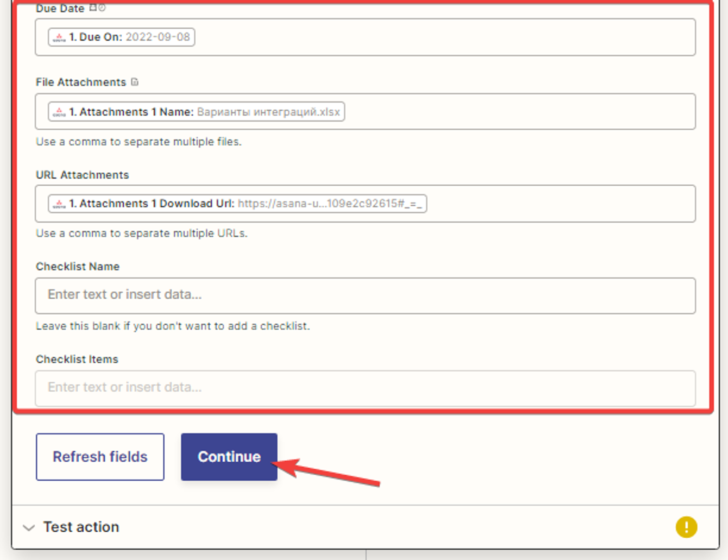
As well as variables for creating tasks. Then click “Continue.”
- In the next window, a notification appears that the card has been created in “Trello.” Click “Continue.”
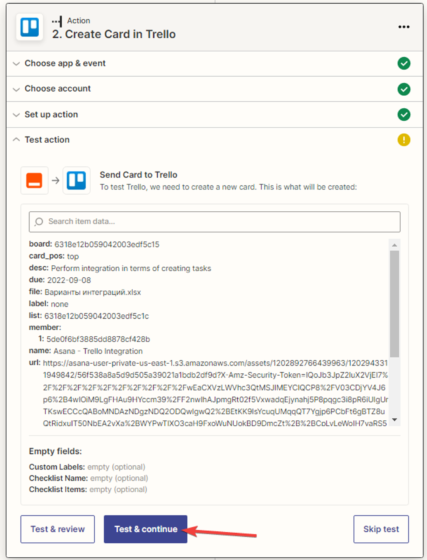
- In the next window, there is a notification that the card has been created in “Trello.”
- We check the test data in “Trello.”
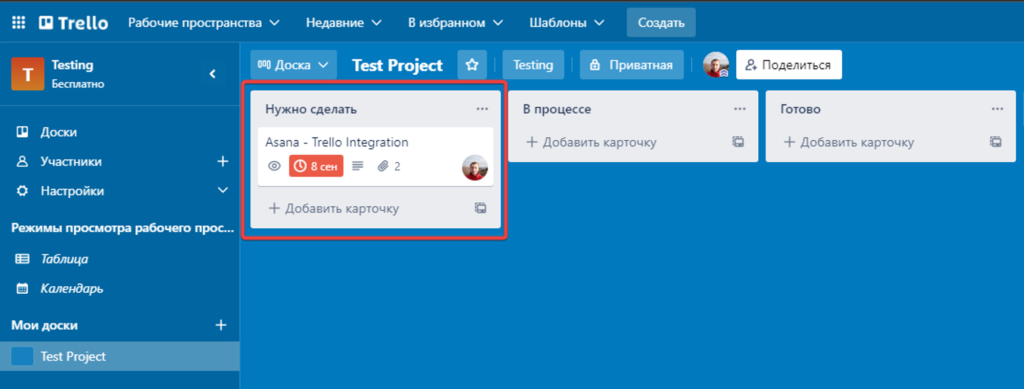
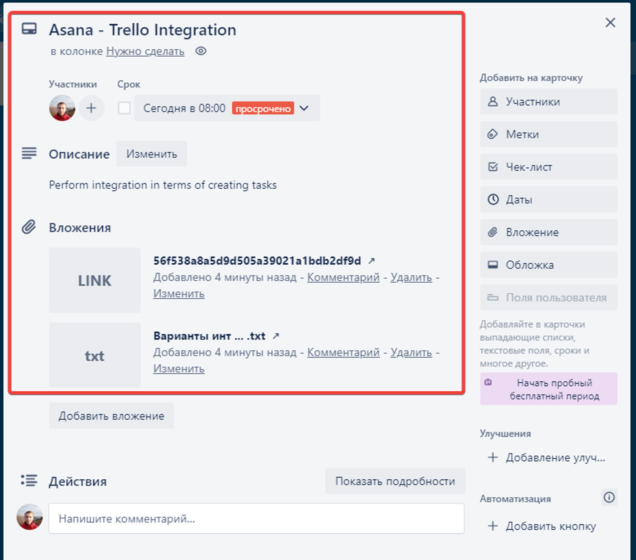
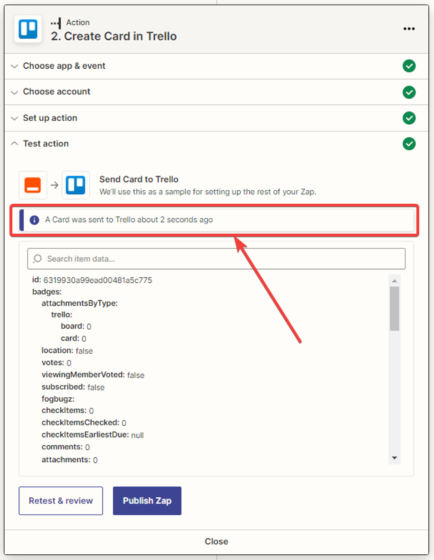
The card has been created on the board, and all the selected data has been added to the card.
After successful testing, click the “Publish Zap” button.