How to integrate HubSpot – Airtable bundle using Zapier?
Explore optimizing data flow from HubSpot to Airtable with Zapier. Automate contact integration to improve data management and operational efficiency.
Creating a new record with data in Airtable when a new contact is created in HubSpot.
How the integration works:
- A new contact is created in HubSpot;
- Zapier creates a new record in Airtable.
What you need:
- Airtable account;
- HubSpot account.
1. Setting up Zap. On the “Dashboard” tab, select the “HubSpot” and “Airtable” applications and click the “Make a Zap” button:

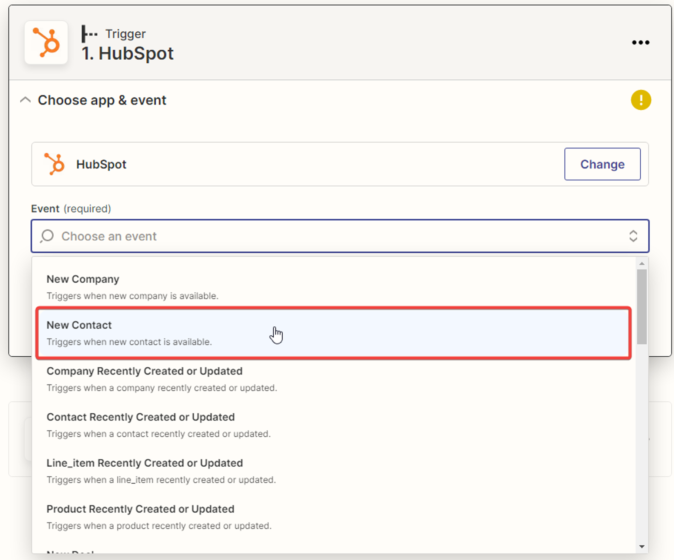
Configuring the trigger event in the “HubSpot” service.
2. Choose the trigger event. Select “New Contact” from the dropdown list and click “Continue“; the trigger will activate when a new contact is added to the “HubSpot” account.
3. Next, you need to specify the “HubSpot” account and click the “Continue” button.

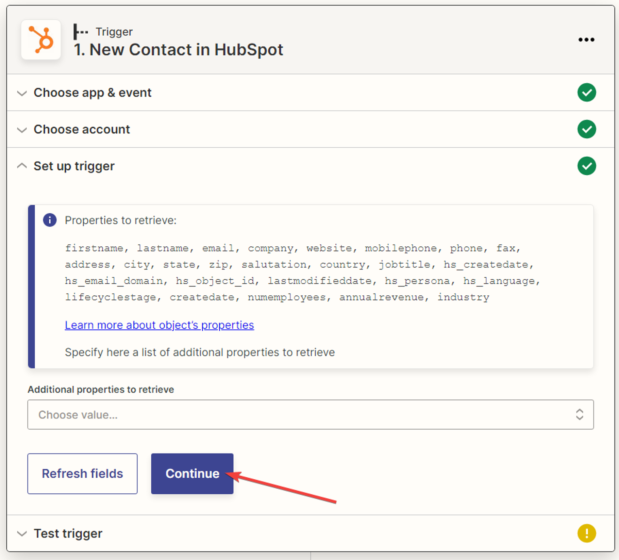
4. Next, you need to set up the trigger settings and click the “Continue” button.
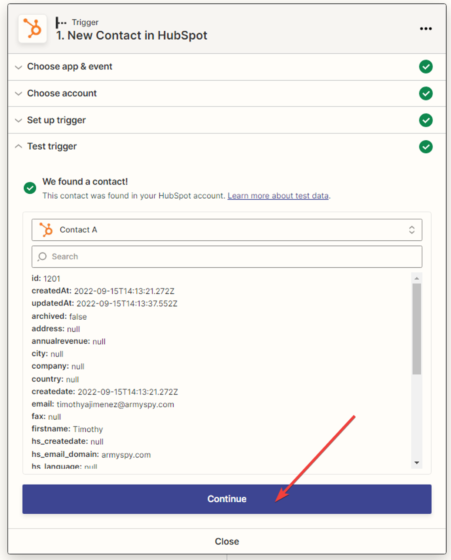
5. After that, you need to test the trigger by clicking the “Test trigger” button.

6. The next step is for the system to find the HubSpot contact.
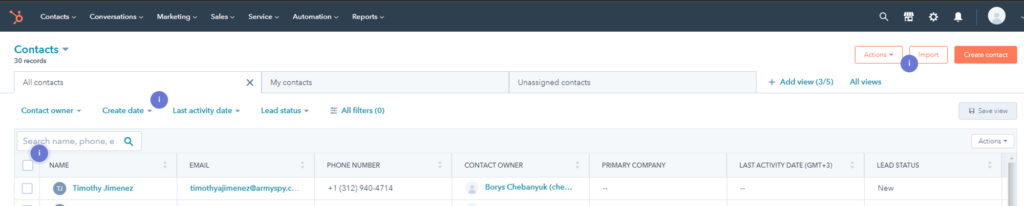
And display all the information available in its profile. Click the “Continue” button.
Setting up the action in the “Airtable” service
7. In the next window, you need to specify the action that will be performed when creating a new contact. For the “Airtable” application, select “Add Row to Sheet” and click “Continue“.

8. Next, you need to connect your “Airtable” account. In your Airtable account, generate an API key.

Insert the generated API key into the appropriate field in the new Zapier window, then click “Yes, Continue.”

Click the “Continue” button.

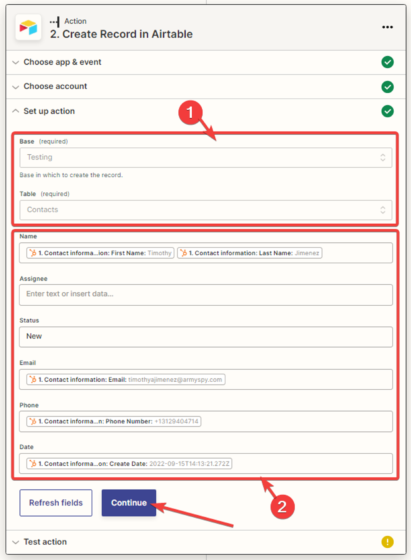
9. Next, you need to set up the connection between the “HubSpot” and “Airtable” applications. Fill in the fields into which the data should be imported.
1) Fill in the required data from the dropdown list.
2) Fill in the data from the provided variables or enter your own value (if there is no suitable variable).
After filling in the fields, click the “Continue” button.
10. You need to test the connection between “HubSpot” and “Airtable.”
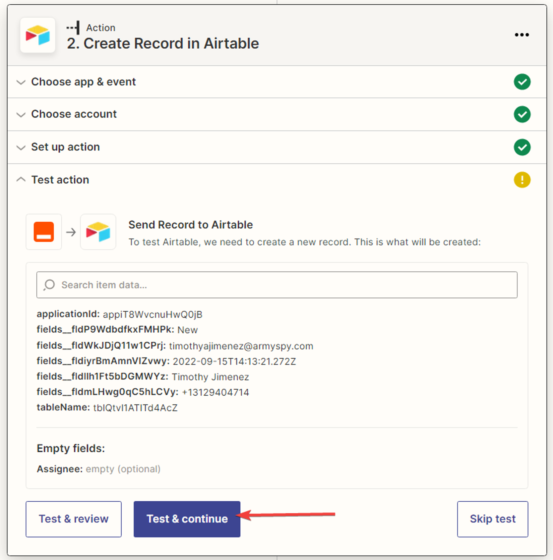
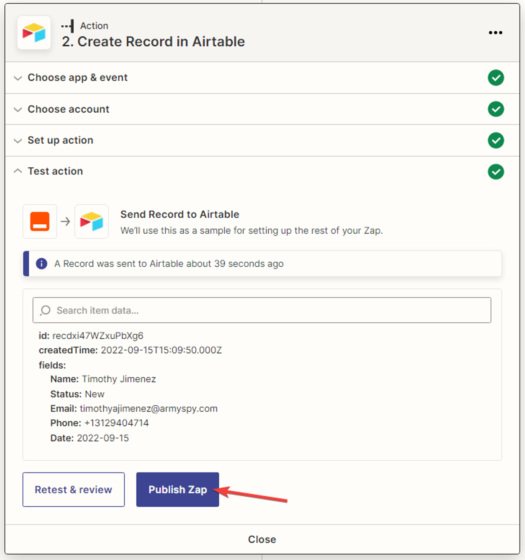
11. Test data has been sent to Airtable.
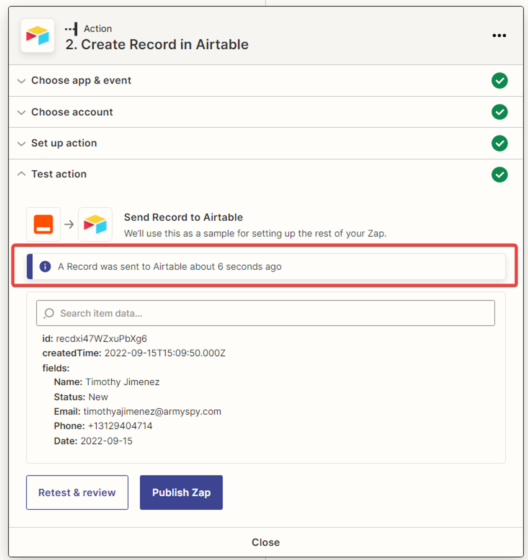
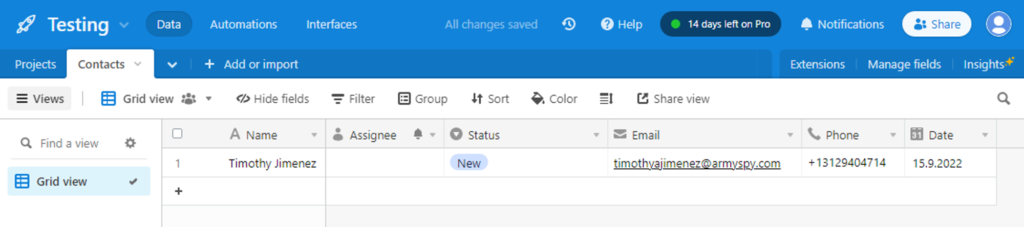
12. Checking the test data in the Airtable service.
13. After a successful test, click the “Publish Zap” button.
14. The Zap has been created, configured, and activated.